The Ultimate Guide to Room Divider Kits & How To Transform Your Space
In modern interior design, room divider kits have gained significant popularity. These kits from Room Dividers Now, including ceiling track room divider kits, screen and desk divider kits, tension room divider kits, etc offer a versatile solution to transform spaces. They provide functionality and aesthetic appeal, allowing you to create distinct areas within a room. From maximizing privacy to enhancing the visual appeal of your space, room divider kits are the ultimate tool for achieving a dynamic and flexible interior layout. This guide will explore the benefits of using these kits and how they can elevate your living or working environment.

Room Divider Kits: Unlocking Functional Interior Design
Room divider kits represent a revolutionary approach to interior design, distinct from traditional room dividers in several key ways. These kits offer unparalleled versatility and customization, making them a preferred choice for those seeking functionality and aesthetics in their living or working spaces.
Types of Room Divider Kits
Room divider kits come in a variety of styles, each catering to different needs and design preferences:
- Sliding Panels: Sliding room divider kits introduce a level of sophistication to your interior design. These kits include elegant panels that move effortlessly along a track system. This innovative design allows you to reconfigure your space, creating separate zones or seamlessly merging them. Whether you want to divide a room for privacy, hide clutter, or change the room's layout, sliding panels provide a versatile and stylish solution. Their sleek and modern aesthetics make them an attractive addition to any contemporary interior.
- Accordion-Style Dividers: Inspired by the foldable design of accordions, these room divider kits offer a space-saving approach to room separation. The accordion-style dividers are characterized by a series of interconnected panels that can expand or contract with ease. This adaptability is invaluable for optimizing your space, especially in smaller rooms or areas with evolving spatial requirements. When not used, accordion-style dividers can be neatly folded away, making them a practical and unobtrusive choice for creating functional divisions within your living or working space.
- Modular Systems: Modular room divider kits give you the creative freedom to design your partition system. Comprising individual modules that can be assembled in various configurations, these kits are a testament to versatility. Whether you want to craft an open shelving unit, a dynamic visual screen, or a room divider with a unique shape, modular systems empower you to bring your vision to life. This adaptability ensures that your divider is tailored precisely to the layout and design of your room, allowing for endless possibilities in interior aesthetics and functionality.
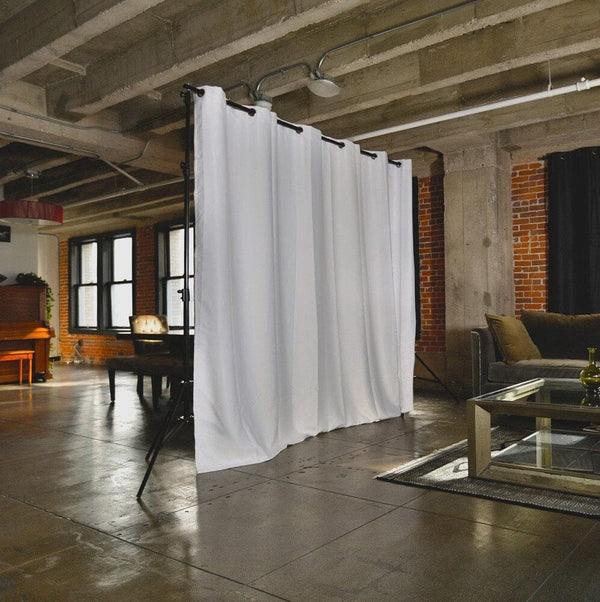
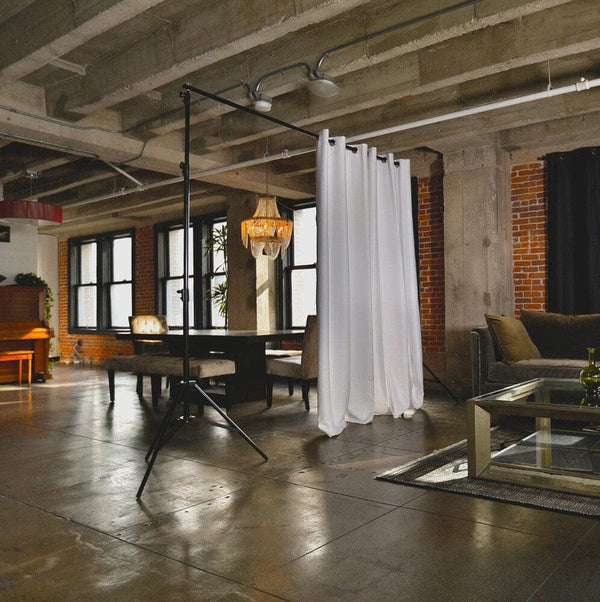
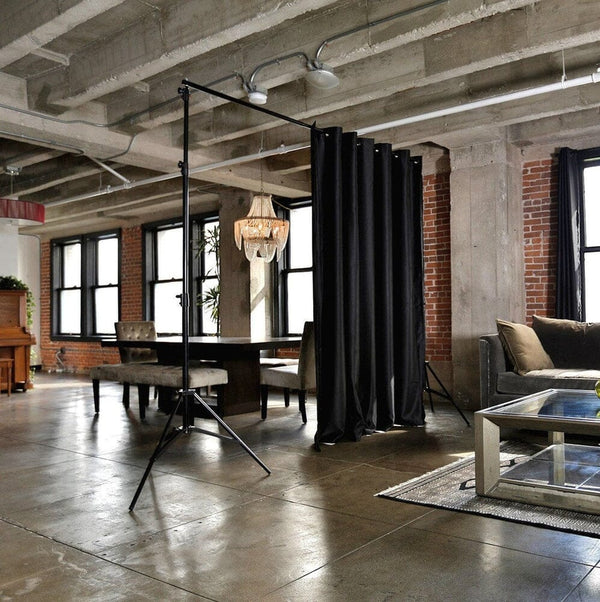
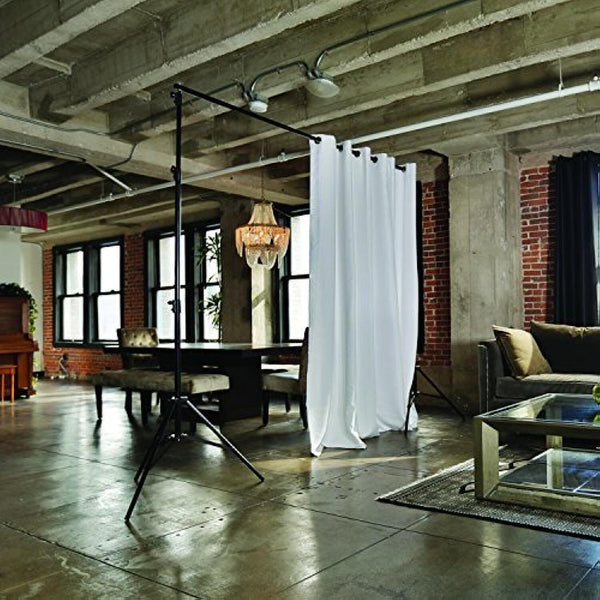
- Freestanding Room Divider Kit: A freestanding room divider kit is a portable and flexible solution for defining spaces within a room. These kits typically feature panels supported by a sturdy base, allowing you to position them anywhere. They're an excellent choice for creating temporary partitions, adding privacy, or enhancing the aesthetics of your space without the need for wall attachments.
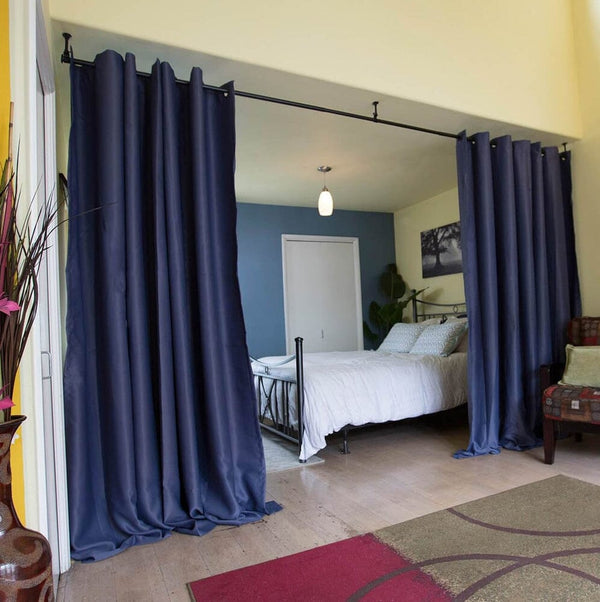
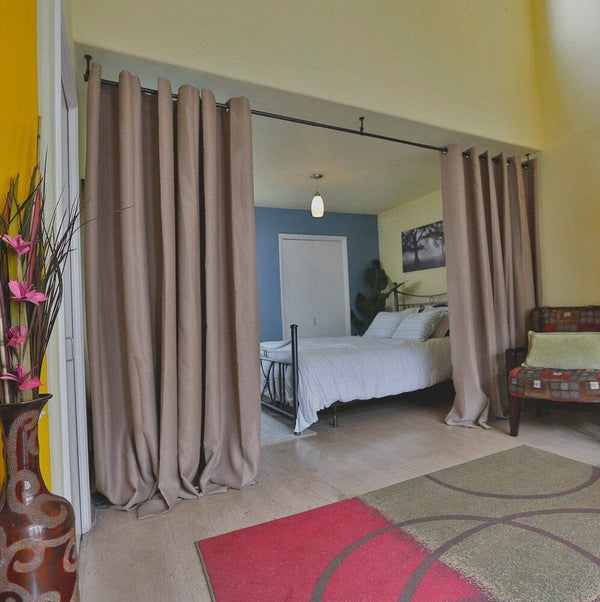
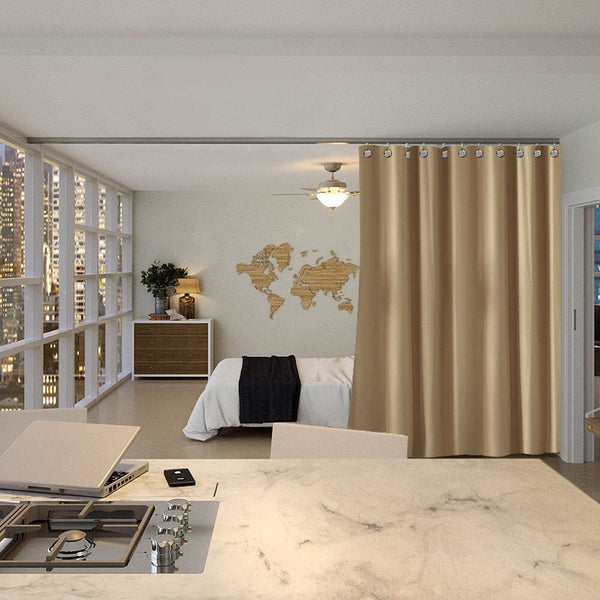
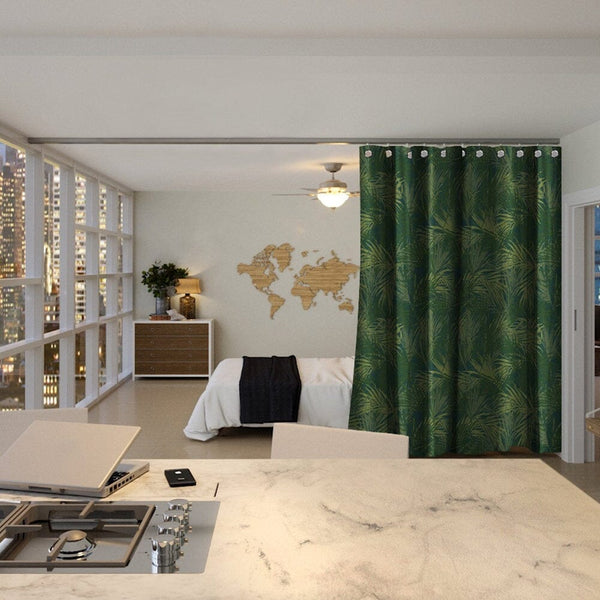
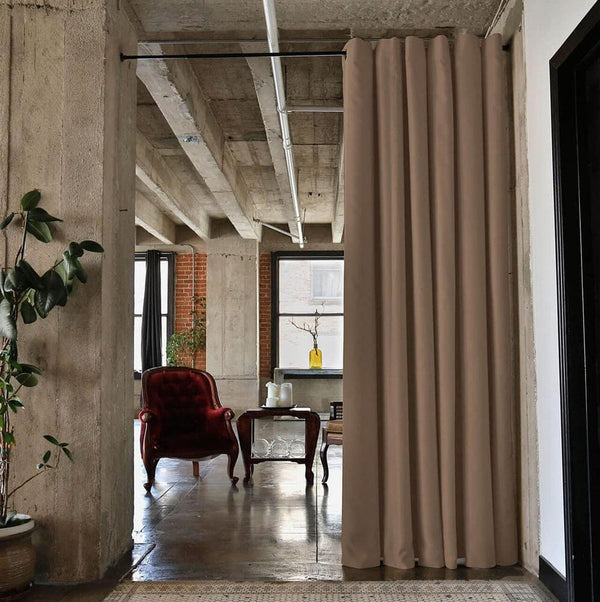
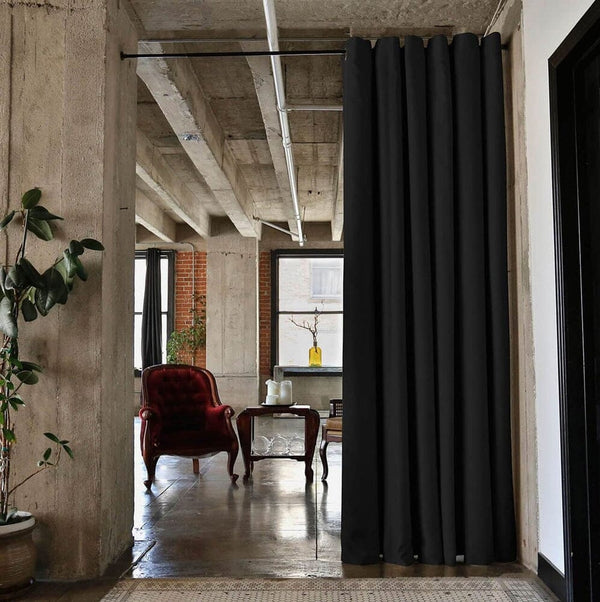
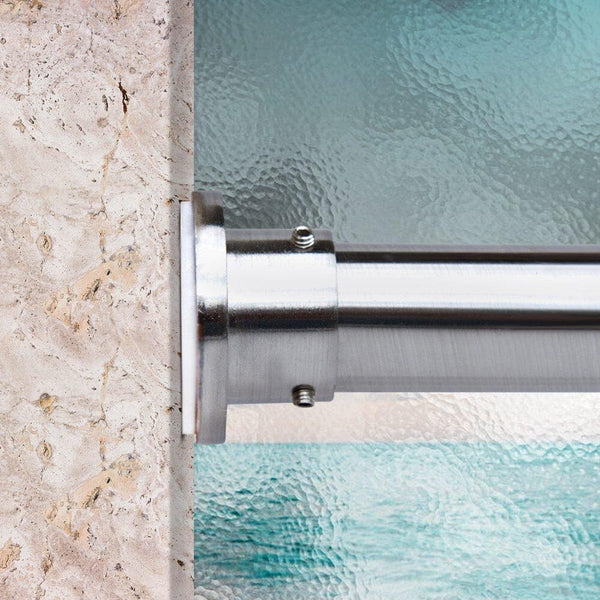
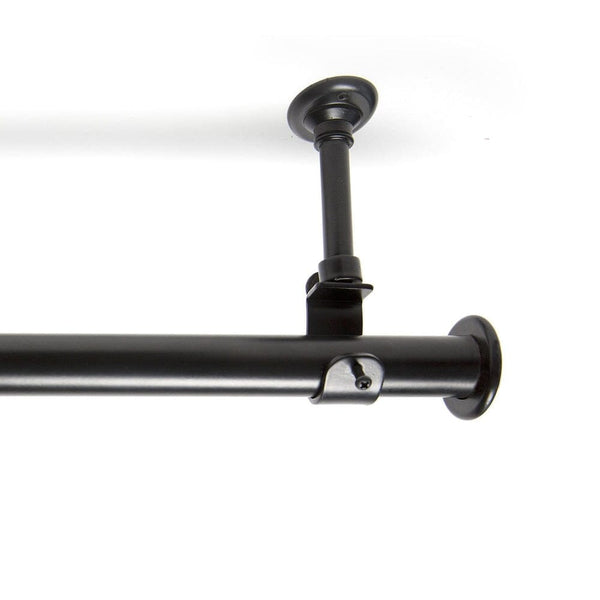
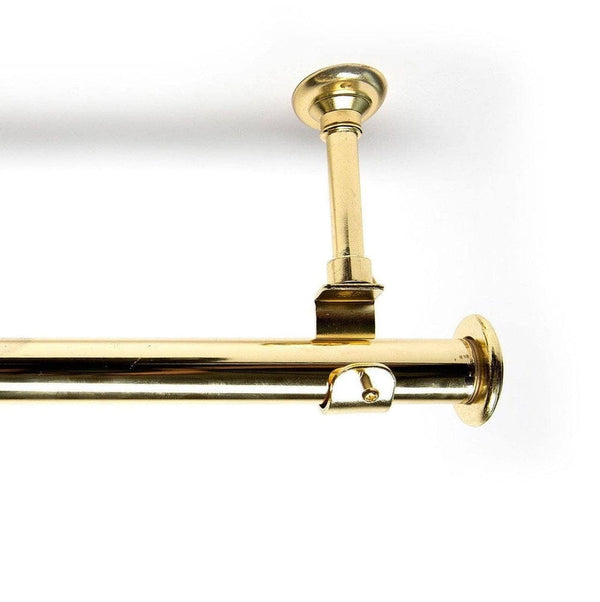
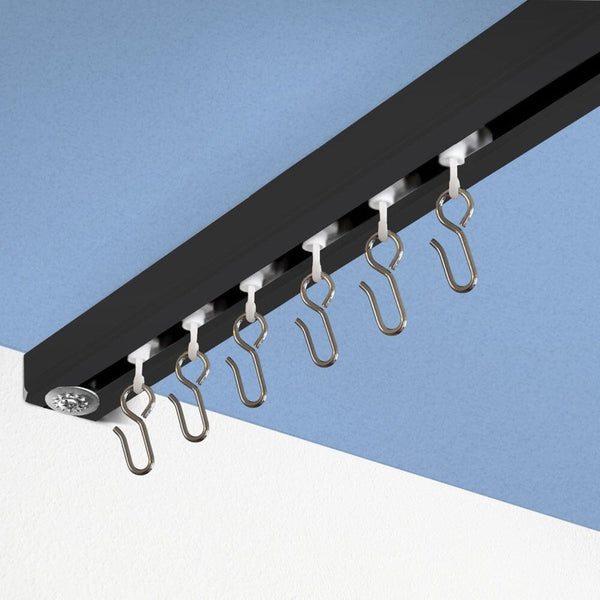
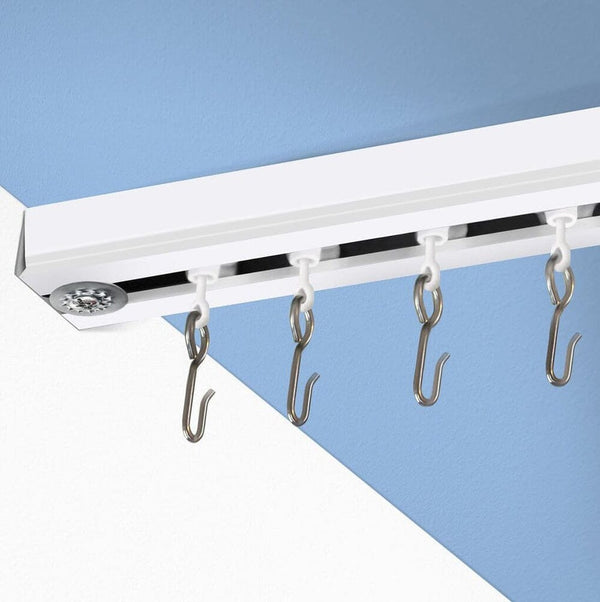
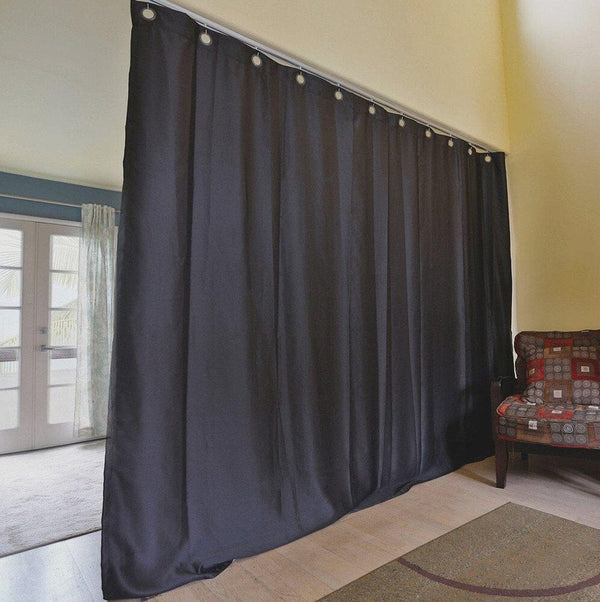
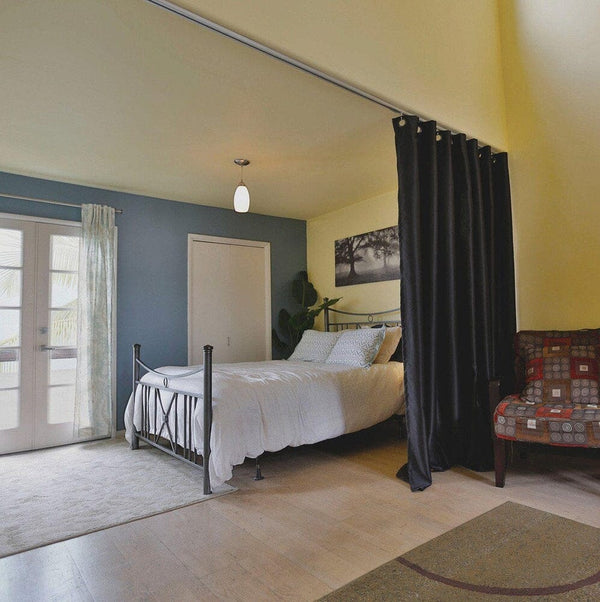
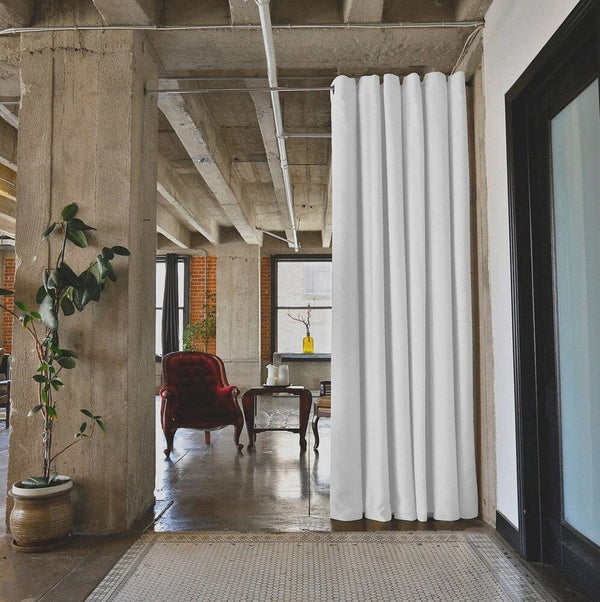
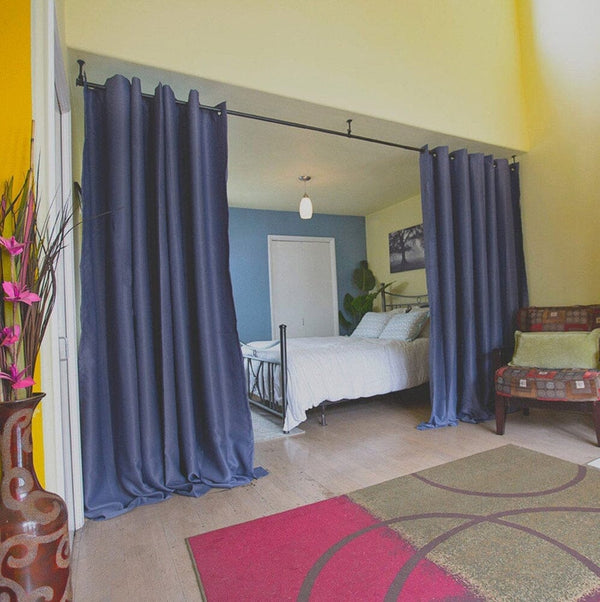
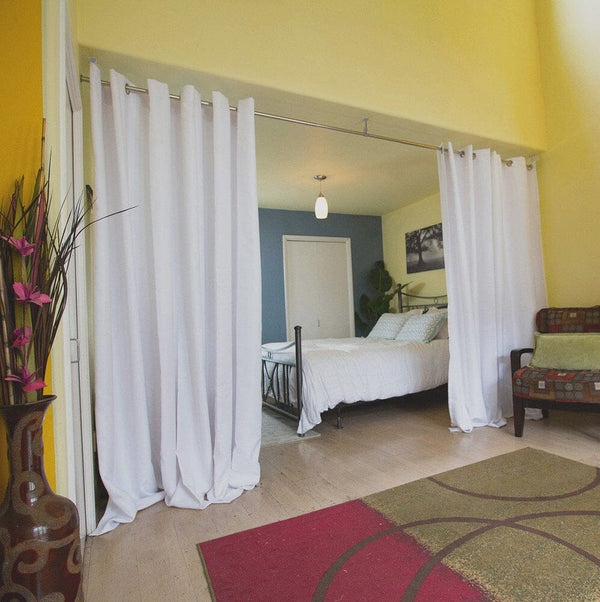
- Hanging Room Divider Kits: Hanging room divider kits are designed to suspend panels from the ceiling, offering a unique and airy separation of space. These kits use ceiling tracks, tension rods or curtain rods to support the panels, allowing easy movement and adjustment. They are an ideal choice when you want to maximize floor space while achieving a sleek, contemporary look.
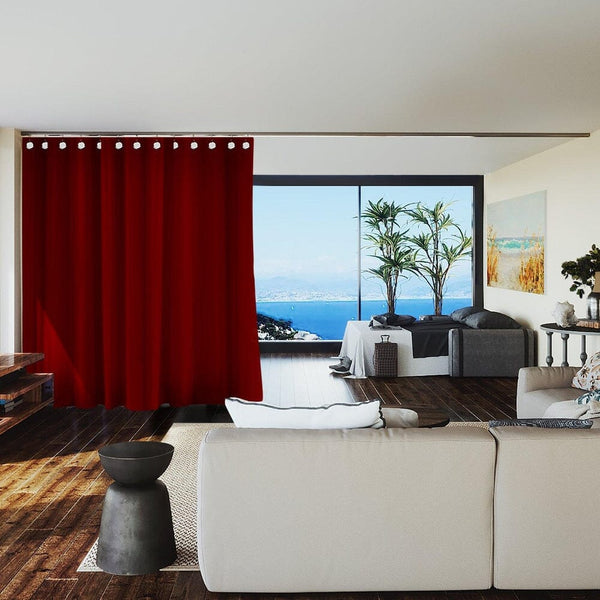
- Wall-Mounted Room Divider: Wall-mounted room dividers provide a semi-permanent solution for separating areas within a room. These kits typically consist of panels that attach securely to the wall using mounting hardware. They offer stability and durability, making them suitable for creating enduring partitions or design elements in your space. Wall-mounted dividers can be customized to match your decor and preferences, adding functionality and style to your interior design.
Customizable Features: Tailoring to Your Taste
One of the standout features of room divider kits is their high degree of customization. You have the freedom to choose:
- Material: Whether you prefer the warmth of wood, the modernity of glass, or the versatility of fabric, there's a material to suit your style.
- Sizes: Room divider kits are available in various sizes, from compact solutions for small spaces to expansive dividers for open layouts.
- Colors: Match your room divider to your existing decor by selecting from a spectrum of colors and finishes.
- Patterns: Some kits offer patterned panels, adding a touch of visual interest to your divider.
Thus, small to large room divider kits elevate interior design by offering diverse styles, easy customization, and the ability to adapt to evolving spatial needs. Whether you're aiming to create private nooks, separate workspaces, or enhance the aesthetics of your home, these kits provide a versatile and stylish solution.
Related read: How to Divide a Room Without a Wall
Choosing the Right Room Divider Kit
Selecting the right room divider kit can significantly impact the functionality and aesthetics of your space. To make an informed decision, consider the following key factors:
- Purpose of Division: Determine the primary purpose of your room divider. Is it to create privacy in a shared bedroom, add aesthetic flair to a living area, or divide a workspace from a lounge? Understanding the purpose will guide you toward the most suitable kit type and design.
- Available Space: Assess the dimensions and layout of your room. Measure the height and width of the area where you intend to install the divider. Ensure the chosen kit can comfortably fit within these dimensions without overwhelming or underutilizing the space.
- Overall Design Theme: Consider your room's existing decor and design theme. The room divider should complement the overall aesthetics. For example, a sleek, modern divider may not harmonize well with a rustic interior. Choose a kit that aligns with your room's style to create a cohesive look.
- Material and Style: Room divider kits come in various materials such as wood, glass, fabric, or metal. Select a material that suits both your aesthetic preferences and practical needs. Additionally, choose a style or design pattern that enhances the visual appeal of your room.
- Mobility and Adjustability: Depending on your requirements, decide whether you need a fixed or movable divider. Some kits, like sliding panels or accordion-style dividers, offer mobility and adjustability, allowing you to change the room's layout as needed.
- Installation: Consider your DIY skills and the complexity of installation. Some DIY room divider kits may require professional installation, while others are designed for easy assembly by homeowners. Ensure that you have the necessary tools and skills for installation or budget for professional help if needed.
- Budget: Set a budget for your room divider kit. Prices can vary significantly based on materials, size, and brand. Stick to your budget to find the best option that meets your needs without overspending. At RDN you can find room divider kits as low as starting at $ 77.99!
- Maintenance: Think about your chosen kit's long-term care and maintenance. Some materials may require more upkeep, so select one that aligns with your maintenance preferences and capabilities.
By carefully considering these factors, you can confidently choose a room divider kit that enhances the functionality and aesthetics of your space, creating a harmonious and visually appealing environment.
Room Divider Installation Process
Installing a room divider kit can transform your bedroom or professional space, but a successful installation requires careful planning and execution. Here's a step-by-step installation process to help you achieve the desired results:
Tools and Materials:
- Room divider kit
- Measuring tape
- Pencil
- Level
- Screwdriver or drill
- Wall anchors (if needed)
- Anchoring hardware (provided with the kit)
- Assistant (for larger dividers)
Step 1: Measure and Mark
Begin by measuring the area where you intend to install the room divider. Mark the desired height on the wall or ceiling using a pencil. Ensure that the line is level for a straight installation.

Step 2: Locate Wall Studs
For wall-mounted dividers, use a stud finder to locate wall studs. These studs provide stable anchor points for the divider. Mark the stud locations on the wall.
Step 3: Install Anchoring Hardware
Our room divider kit includes anchoring hardwares (such as brackets or clips). Simply attach it to the wall or ceiling according to the manufacturer's instructions. Ensure they are level and securely fastened.

Step 4: Attach Track or Mounting Hardware
Install the track or mounting hardware provided with your room divider kit. Ensure that it aligns with the marks you made in Step 1. Use a level to confirm that it's perfectly horizontal or vertical.
Step 5: Assemble the Divider
Follow the RDN’s instructions to assemble the room divider. This may involve attaching panels, tracks, or frames together. Double-check that all components are securely connected.
Step 6: Hang or Install
Depending on your kit type (e.g., sliding panels, hanging system), hang or install the room divider on the track or mounting hardware. Ensure it glides smoothly and aligns with the marked height.

Step 7: Adjust and Secure
Make any necessary adjustments to ensure the divider is level and stable. If wall-mounted, use wall anchors to secure it firmly in place. For ceiling-mounted dividers, ensure it's properly anchored to prevent swaying.
Step 8: Test and Finalize
Carefully test the functionality of your room divider. If it's a sliding or folding type, ensure it moves smoothly and locks in position as desired.
Tips and Precautions:
- Always follow the RDN's installation instructions.
- Check wall or ceiling stability to support the divider's weight.
- Use wall anchors if your wall cannot be anchored to studs.
- Consider professional installation, especially for larger or complex dividers, if in doubt.
- Ensure that the room divider is level to prevent issues with functionality.
- Regularly inspect and maintain your divider to ensure its long-term performance.
Click here for a more detailed Installation Process
With these steps and precautions in mind, you can successfully install your room divider kit, enhancing both the functionality and aesthetics of your living or working space.
Enhancing Functionality and Style with Room Divider Kits
Room divider kits offer endless possibilities for maximizing functionality and style in your living or working space. Here are creative ways to make the most of your divider:
- Integrate Storage Solutions: Many room divider kits can be customized to include shelves, cubbies, or hooks. This addition not only separates spaces but also provides practical storage for books, decor, or everyday essentials. It's perfect for open-plan living areas, offices, or bedrooms.
- Create a Workspace: Room divider kits are excellent for carving out a dedicated workspace in a larger room. Opt for a divider with built-in shelves or a desk attachment to establish an efficient home office within your living room or bedroom. This separation helps maintain focus and productivity.
- Designate a Dining Area: In studio apartments or open-layout homes, use a room divider to define a dining area. Choose a divider with a dining table attachment or position it strategically to create a cozy dining nook. It's a stylish way to separate eating and living spaces.
- Build a Media Center: Transform your room divider into a multimedia hub by incorporating a TV stand, media console, or wall-mounted screen. This setup is ideal for entertainment rooms, as it separates the viewing area from the rest of the space while providing a dedicated spot for your media equipment.
- Customize for Bedrooms: Bedroom room divider kits can enhance bedroom aesthetics and functionality. Consider dividers with mirror panels to add depth and create the illusion of a larger space. You can also add built-in lighting for a cozy and ambient bedroom atmosphere.
- Divide a Shared Kids' Room: Room dividers work wonders in shared kids' rooms. Choose a playful and colorful divider to give each child their designated space. You can even attach a chalkboard or corkboard for added functionality and creativity.
7. Craft a Dressing Area: For open-plan master bedrooms or dressing rooms, room dividers with full-length mirrors can serve as elegant dressing areas. They provide privacy and a functional space for getting ready.
|
Room Type |
Ideal Room Divider Kit |
|
Freestanding dividers with built-in shelving for decor and storage. |
|
|
Dividers with mirror panels or ambient lighting for added charm. |
|
|
Dividers featuring integrated desks or workstations. |
|
|
Studio Apartment |
Sliding or folding dividers to separate sleeping and living areas. |
|
Dining Room |
Dividers with dining table attachments for designated eating space. |
|
Colorful and playful dividers with chalkboards or cork boards. |
|
|
Entertainment Room |
Media center dividers with TV stands or screen attachments. |
|
Rugged and durable dividers for creating workspace or storage zones. |
Room Divider Selection by Room Type:By creatively customizing your room divider kit and selecting the right type for your room, you can achieve a harmonious blend of functionality and style, ensuring that your space is both practical and visually appealing.
Maintenance and Care for Room Divider Kits
Proper maintenance and care of your room divider kit are essential to ensure its longevity and continued functionality. Here are guidelines based on standard material compositions:
Fabric Room Dividers
- Dust Regularly: Fabric dividers can collect dust over time. Use a lint roller, vacuum cleaner with a brush attachment, or a soft cloth to remove dust and debris.
- Spot Clean: Gently blot the affected area with a damp cloth and mild detergent for stains or spills. Avoid rubbing, as it may damage the fabric.
- Avoid Sun Exposure: Prolonged exposure to direct sunlight can cause fabric colors to fade. Position fabric dividers away from direct sunlight or use window treatments to filter sunlight.
- Periodic Washing: If the fabric is removable and machine washable, follow the manufacturer's instructions for washing. Be sure to reattach it securely after cleaning.
Wood Room Dividers:
- Dust and Polish: Dust wooden dividers regularly with a soft, dry cloth. Periodically, use a wood cleaner or polish to maintain their luster and protect against dryness or cracking.
- Avoid Moisture: Wood can be sensitive to moisture. Keep dividers away from areas prone to high humidity or spills. Use coasters or mats to protect against liquid damage.
- Inspect for Pests: Check for signs of wood-boring pests, such as termites or woodworms. If detected, consult a professional pest control service.
- Prevent Scratches: Be cautious when moving objects near wooden dividers to prevent scratches. Felt pads on furniture legs can help minimize damage.
Metal Room Dividers:
- Clean Regularly: Wipe metal surfaces with a soft, damp cloth to remove dust and fingerprints. Use a mild metal cleaner or a mixture of water and vinegar for stubborn stains or grime.
- Rust Prevention: If your metal divider is susceptible to rust, inspect it periodically for signs of corrosion. Treat any rust spots promptly with rust remover and touch-up paint.
- Lubricate Moving Parts: If your room divider has moving parts, such as sliding panels, lubricate them with a silicone-based lubricant to ensure smooth operation.
Glass Room Dividers:
- Clean with Care: Clean glass dividers with a glass cleaner and a lint-free cloth or paper towel. Avoid using abrasive materials that may scratch the glass.
- Maintain Hardware: Regularly check the condition of hinges, handles, or any metal hardware. Tighten loose screws or bolts as needed.
- Protect Edges: Be cautious around the edges of glass dividers, as these areas are more vulnerable to chipping or breakage.
General Maintenance Tips For Room Dividers
- Read Manufacturer Instructions: Always follow the manufacturer's maintenance guidelines for your room divider kit.
- Inspect for Damage: Periodically inspect your room divider for any signs of damage or wear. Address any issues promptly to prevent further deterioration.
- Avoid Harsh Chemicals: Avoid using harsh chemicals, solvents, or abrasive cleaning agents, as they can damage the divider's materials.
- Store Properly: If you need to remove or store your divider temporarily, do so in a dry, cool place away from direct sunlight and moisture.
By following these maintenance tips based on the material composition of your room divider kit, you can keep it looking great and functioning smoothly for years to come.
Transform Your Room Into A Private, Efficient Space
Ready to redefine your living or working areas with the versatility and style of room divider kits? Explore our wide selection of room divider kits from RoomDividersNow (RDN) and discover endless possibilities for enhancing your space. Whether you seek privacy, organization, or a touch of elegance, our curated collection has the perfect solution.