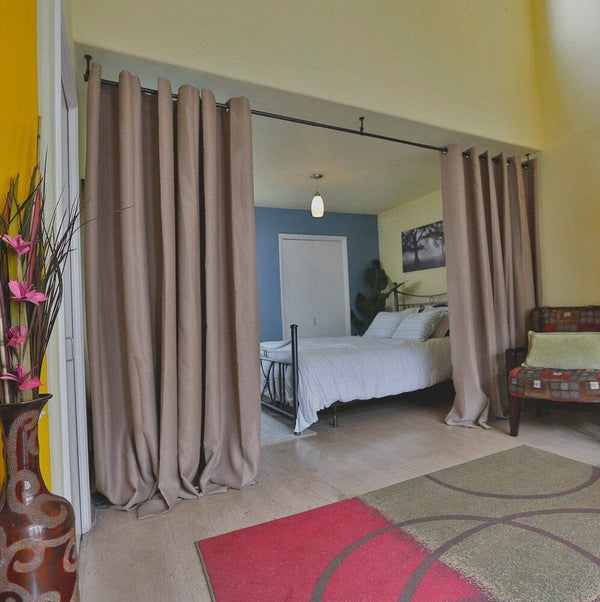
How to set up


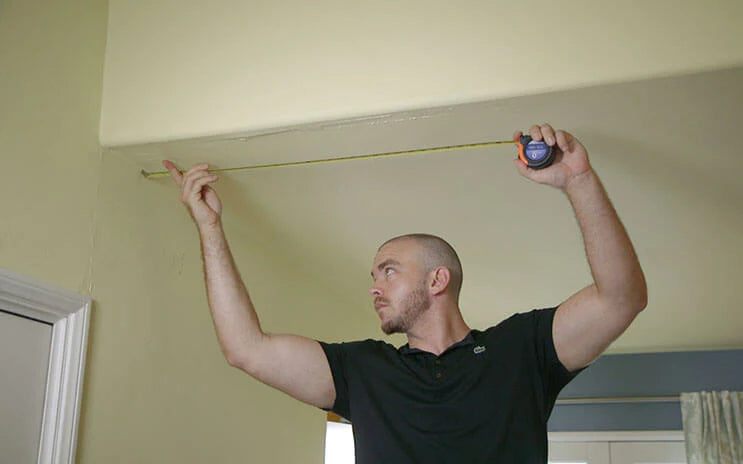
Determine the exact length of track needed for your installation.
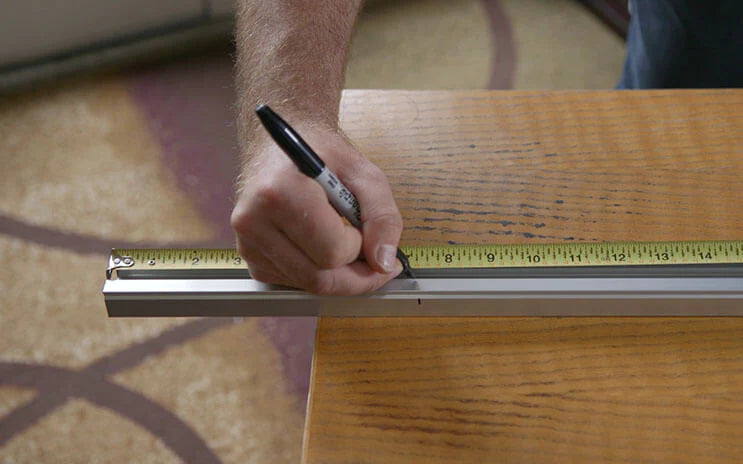
If the track length needs to be shortened, mark the track at the desired cutting point.
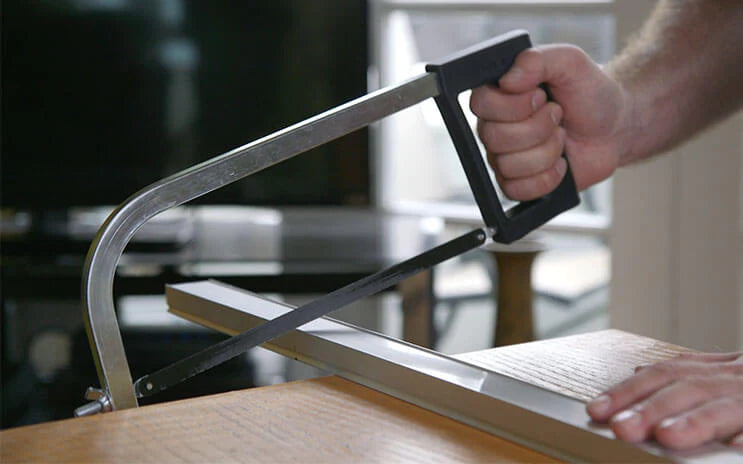
Using the saw included in your kit, cut the marked piece of track to achieve the desired total length.
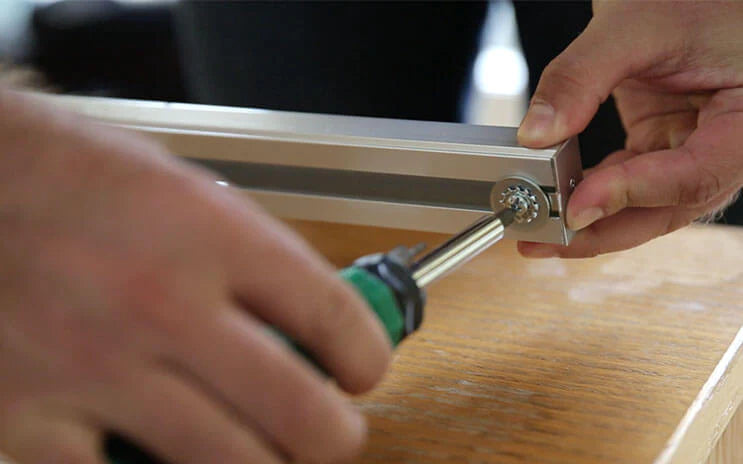
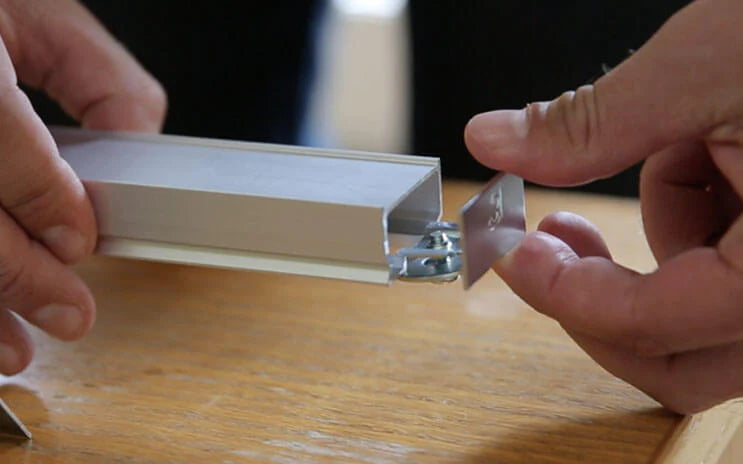
Install an end cap on the first section of track to be installed. Please note, if your first section of track is being installed tight to an end wall, be sure to install the end cap first.
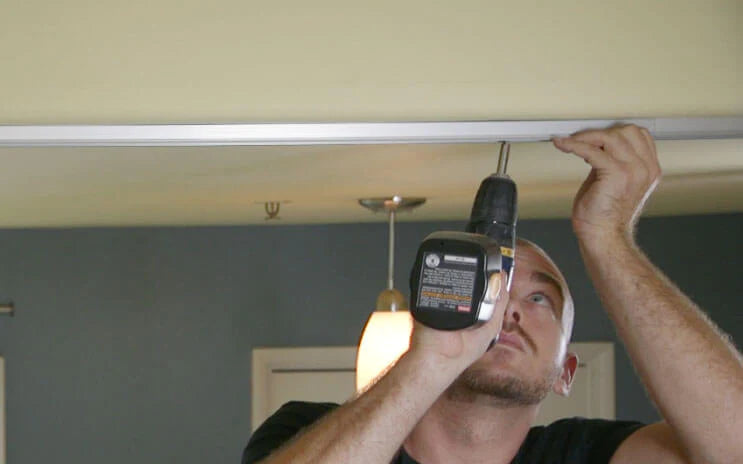
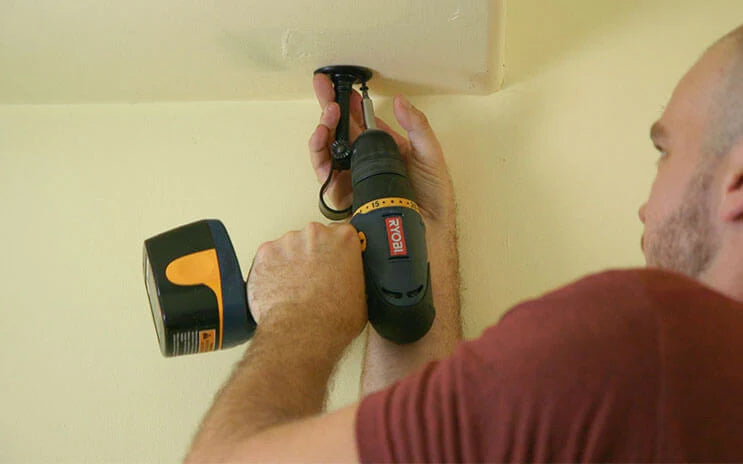
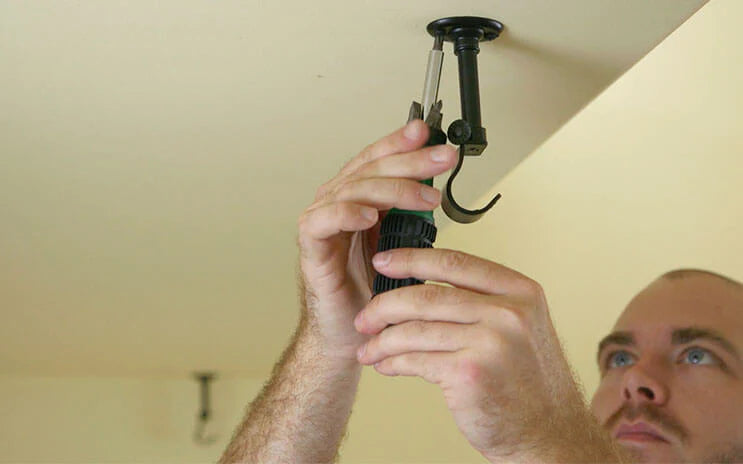
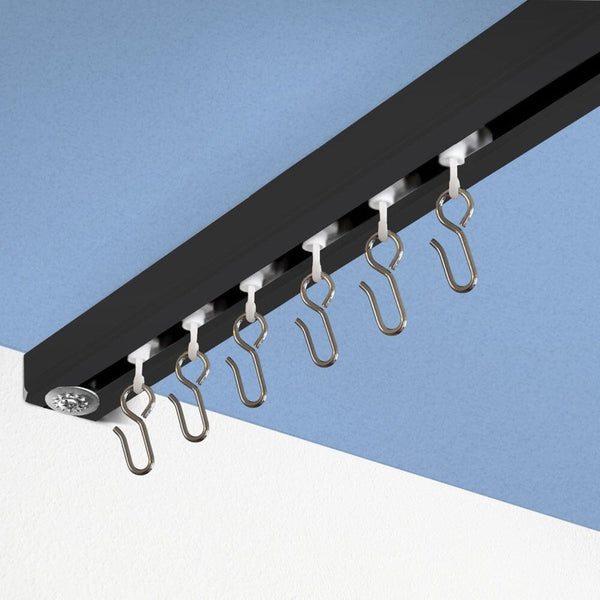
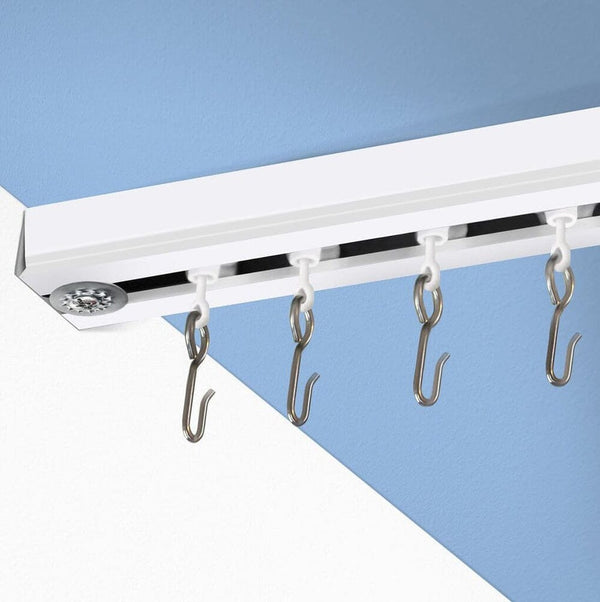
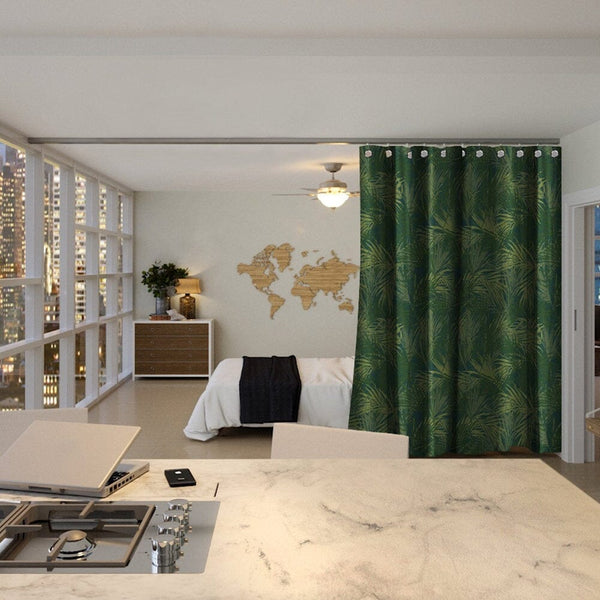
Attach the track to the ceiling.
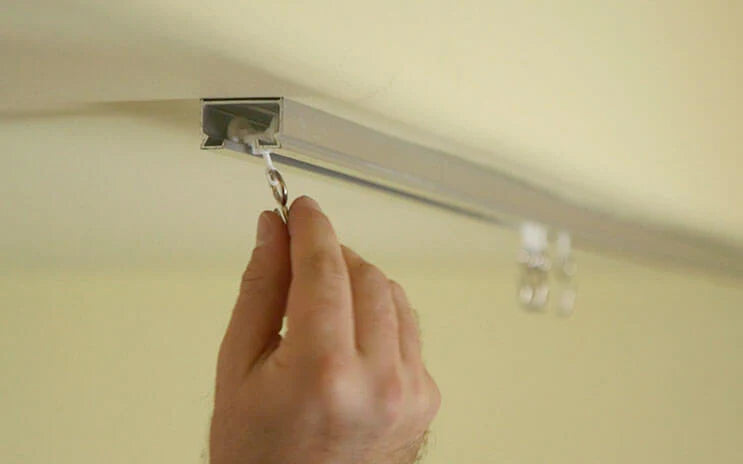
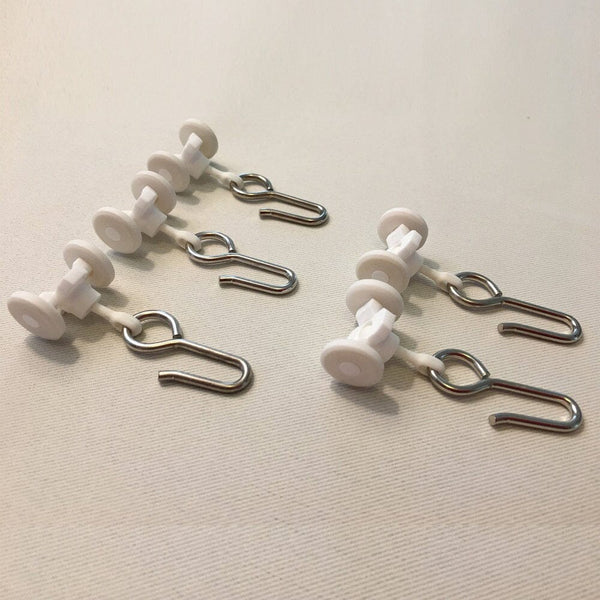
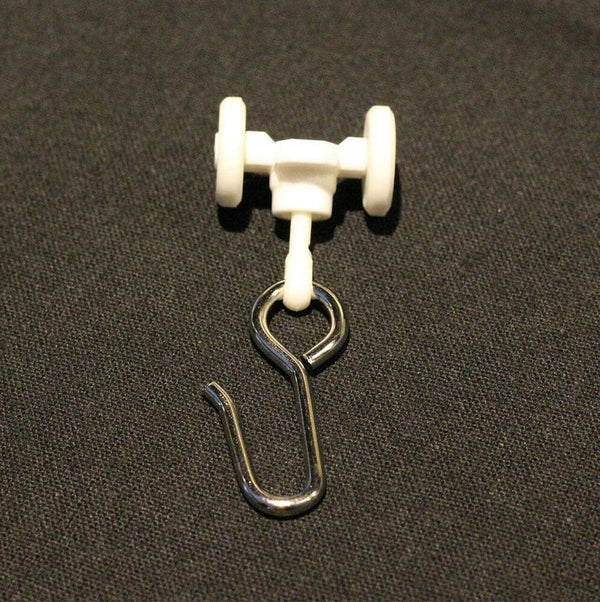
Slide the rolling hooks into the track.
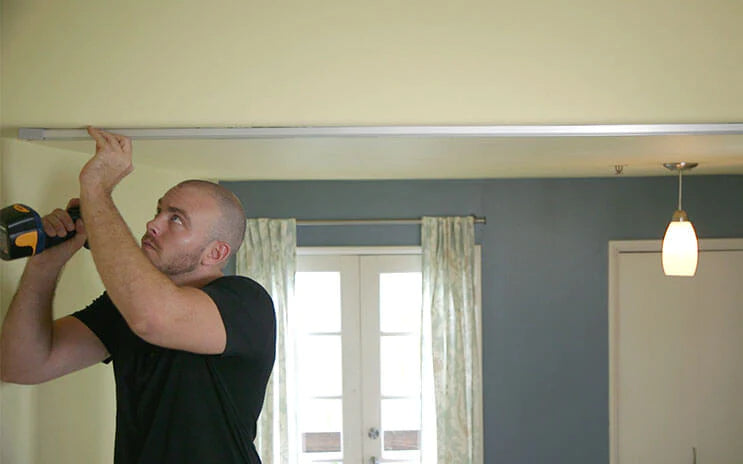
Line up and install additional track pieces (if needed). Make sure that each additional track section is aligned straight with the installed track and that there is no gap between track sections.
Make sure to install the opposite end cap.
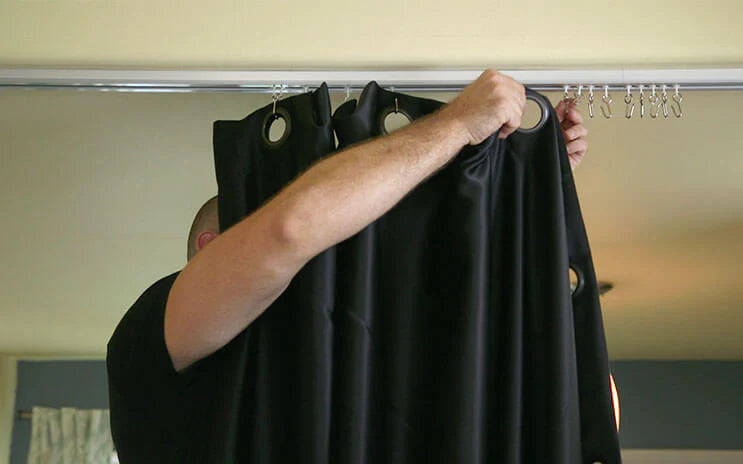
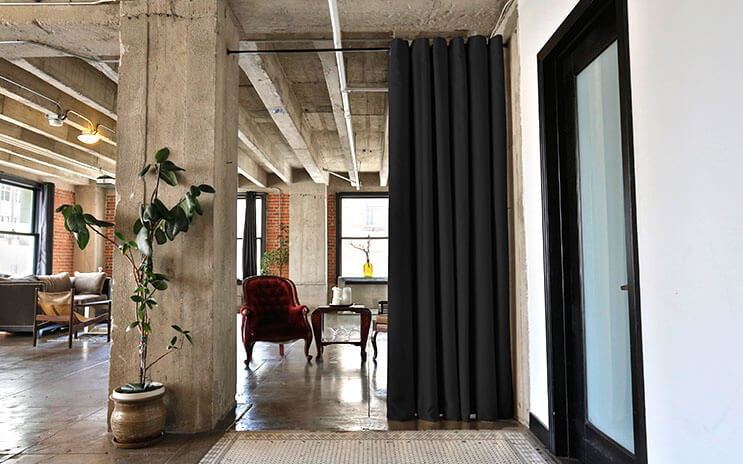
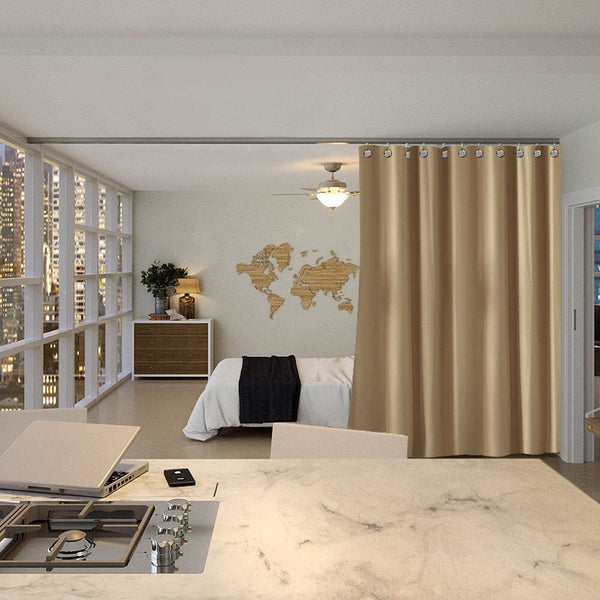
Hang your room divider curtain(s) on the roller hooks.
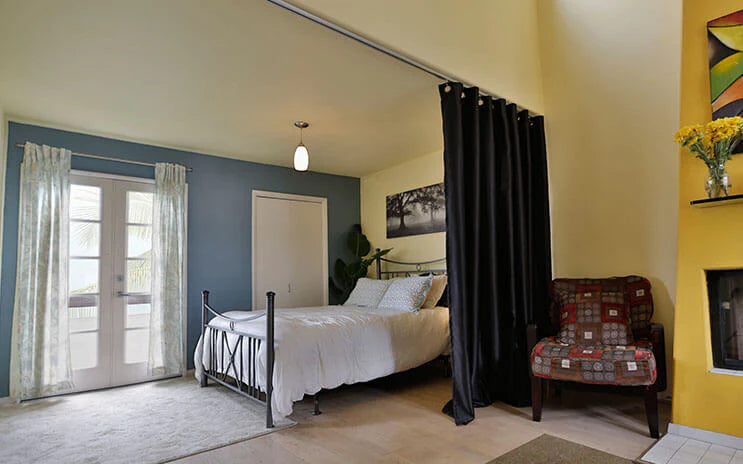
And there you have it! A ceiling track room divider kit setup in no time!
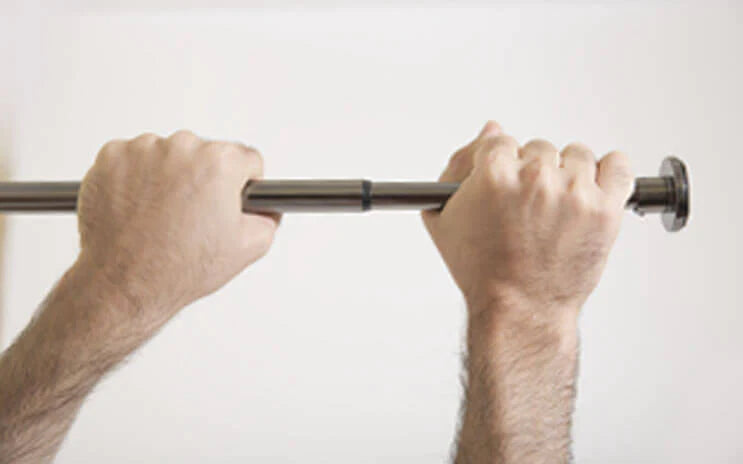
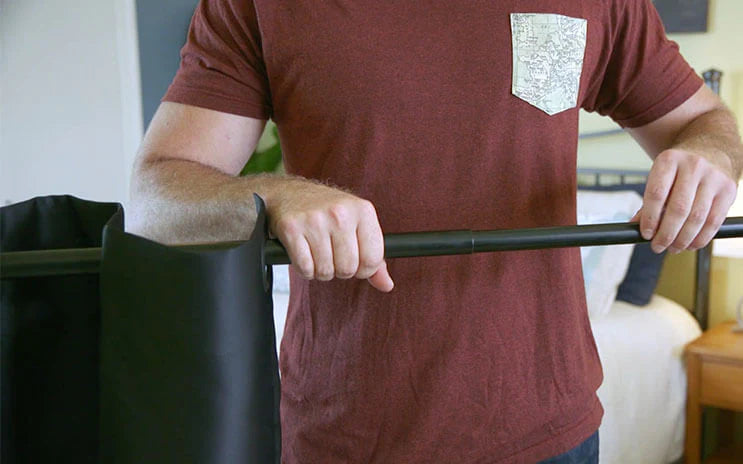
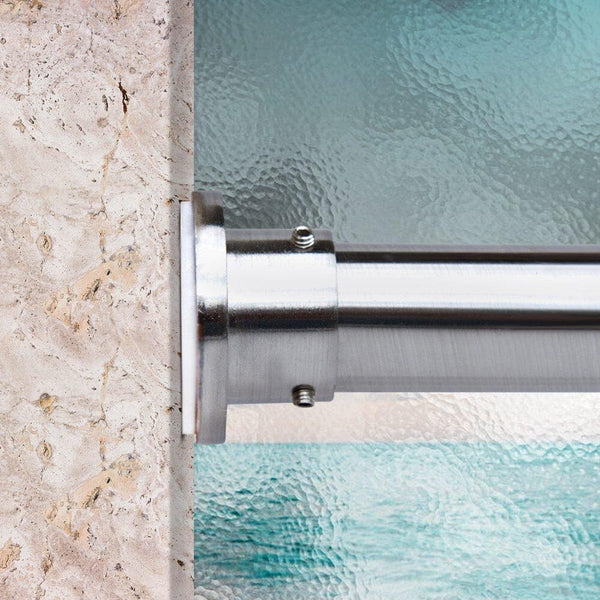
Lengthen the Tension Rod to a size approximately 1 inch larger than the distance between the walls that will hold the rod. To lengthen: hold one side of the rod while turning the other side counter clockwise.
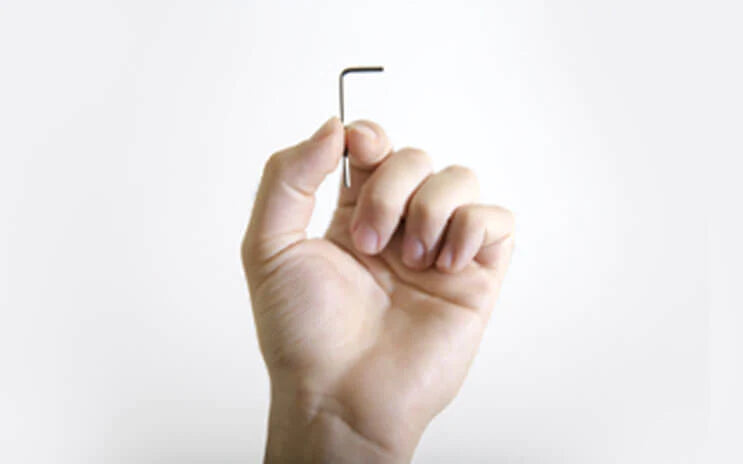
Grab the allen wrench from your room divider kit.
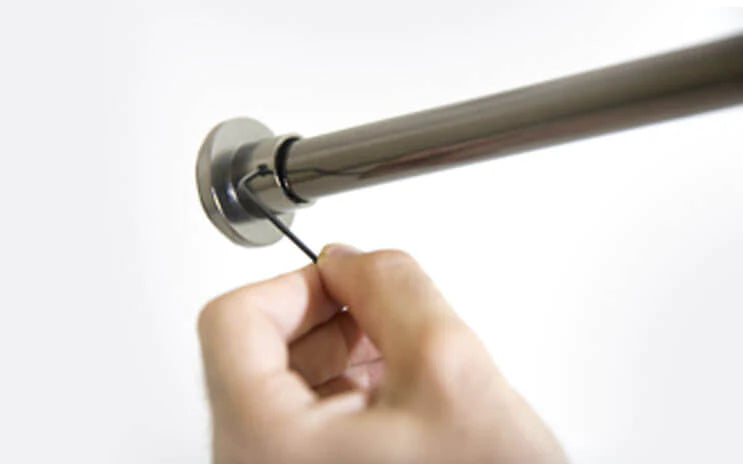
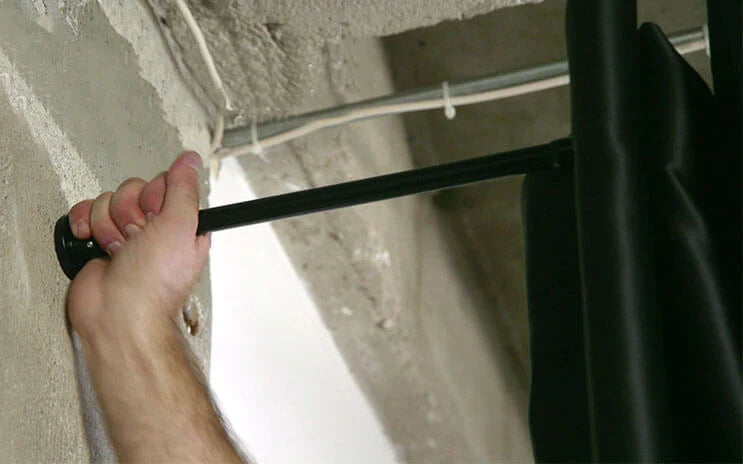
Use the allen wrench to loosen (but don't remove) the set screw on one of the end caps just enough to remove the end cap.
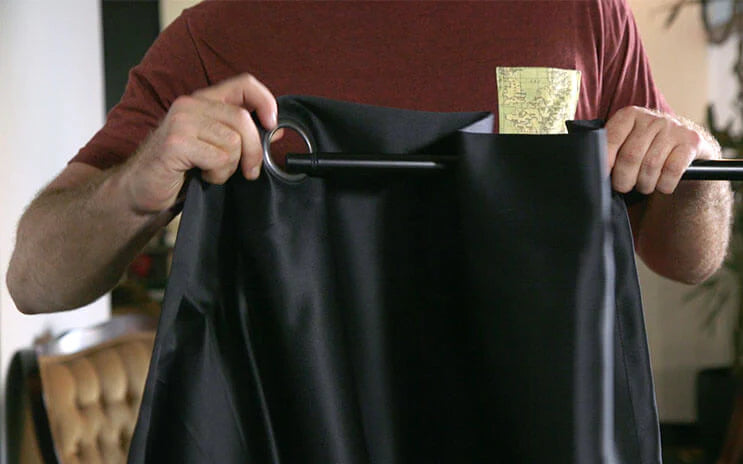
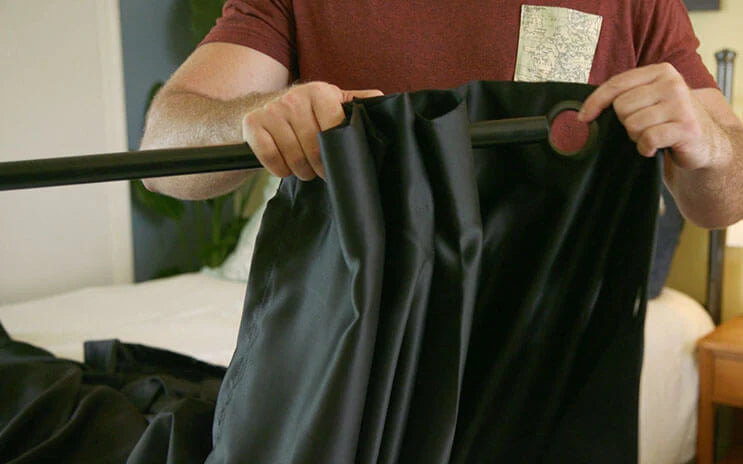
Slide the room divider over the tension rod.
Place the end cap back in place on the rod and tighten the set screw with the allen wrench.
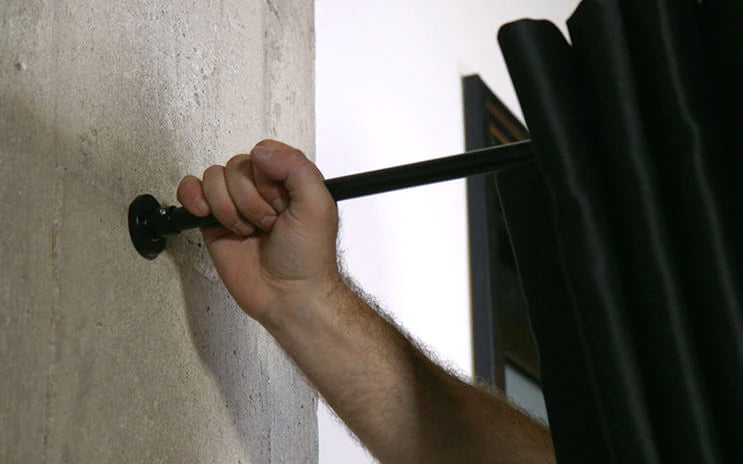
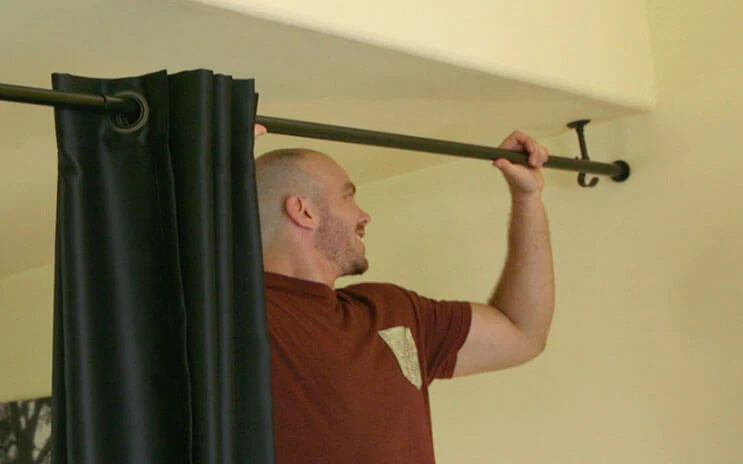
Grab the rod at one end with both hands and place the end cap of the opposite end of the rod at the desired position on the opposite wall.
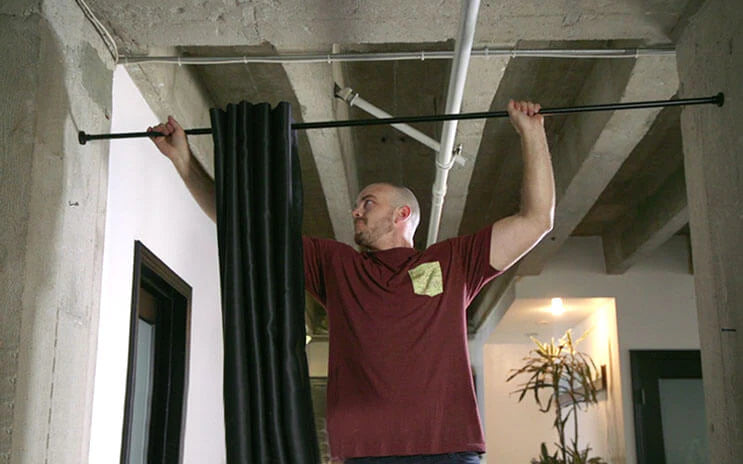
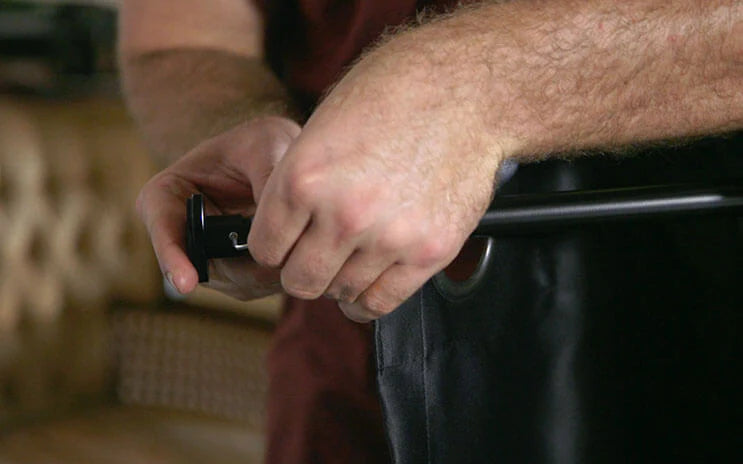
Push the rod against the opposite wall with enough force to cause the rod to reduce in size. You can then bring the end closest to you up to its' final position.
Make sure the rod has enough tension to stay firmly in place but not so much tension that might cause the rod to bend. You can increase or decrease the tension by turning the rod while still pressing the other end against the opposite wall.

Three tug test time! Pull down on the rod and room divider three times to make sure it is secure.
And there you have it! A tension rod room divider kit setup in no time!
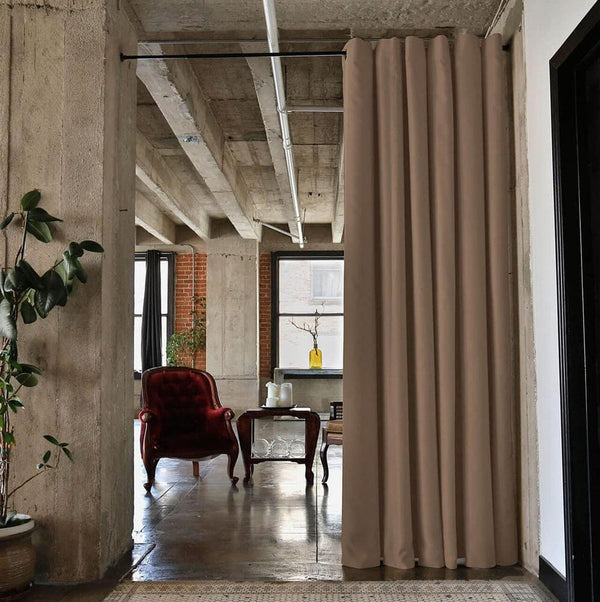
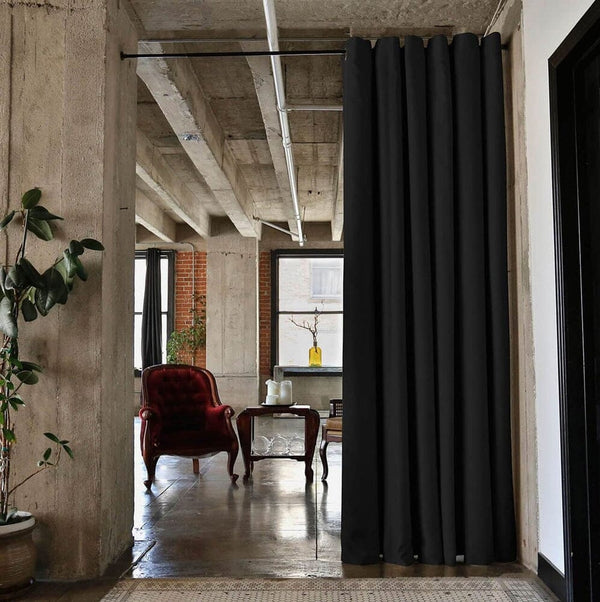
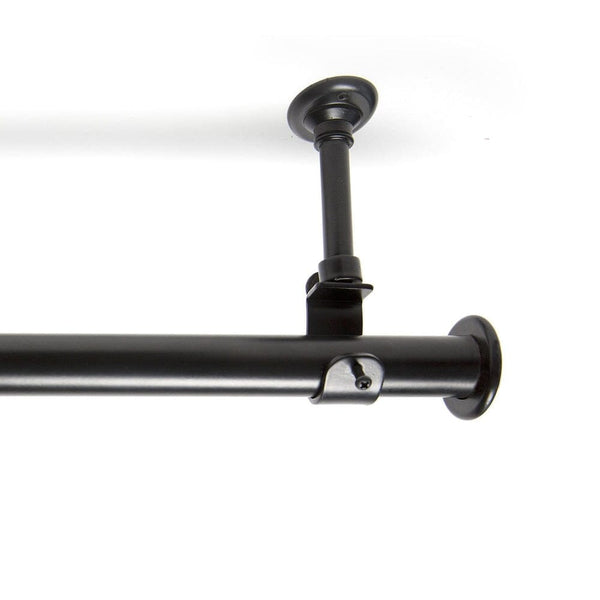
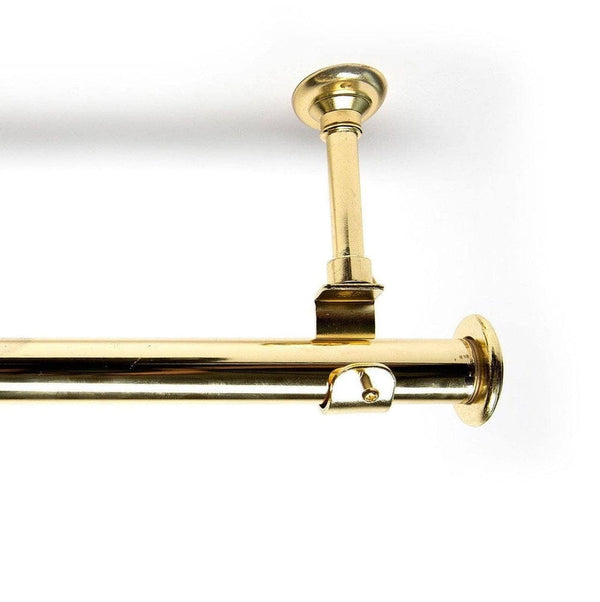
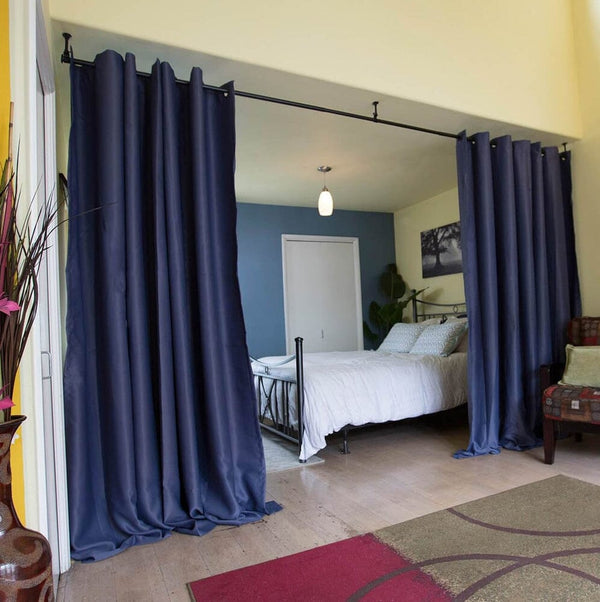
Install a support bracket at each end of the area you are dividing (brackets attach to the ceiling).
Install a center support bracket if needed. Please note: kits sizes Large, XL, XXL, & XXXL come with 2 room divider curtains that meet at the middle support bracket when closed.
Slide the room divider over the hanging rod prior to attaching the rod to the support brackets.
Connect sections of hanging rod.
Place the hanging rod on the support brackets. Tighten the screw on each support bracket until the hanging rod is firmly gripped.
And there you have it, a hanging room divider kit in no time! Quantity and length of the room divider(s), hanging rod(s), and support brackets will vary based on the size of your kit. Detailed installation instructions for each kit size are included with your order.
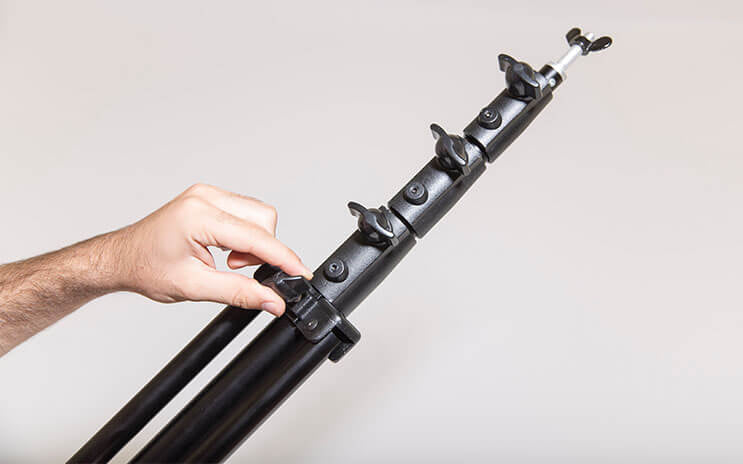
Begin by setting-up the tri-pod stands. For the first tri-pod stand, loosen all 5 black wing nuts allowing the center pole to slide freely.
Turn the stand upside down and rest the top pin on the floor while holding the legs in the air. Be sure to hold the top of the stand when bringing it to the floor to keep the pole from sliding down.
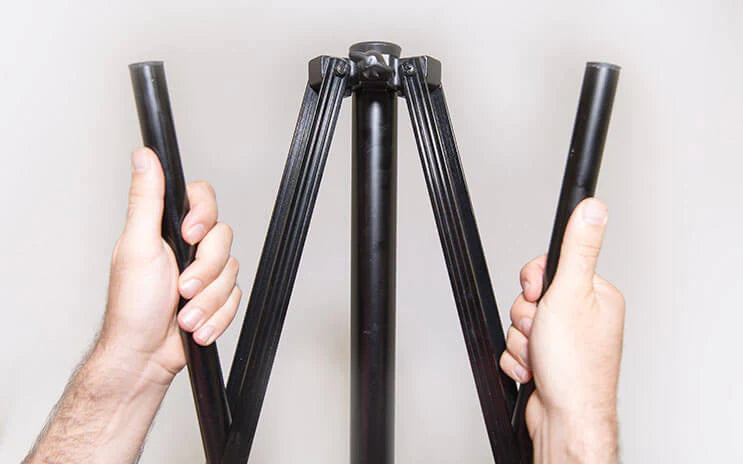
Spread the legs out and push the round collar, which holds the leg brackets to the pole, downward until the legs begin to collapse inward toward the pole.

Slide the pole downward until the bottom of the pole is touching the collar.
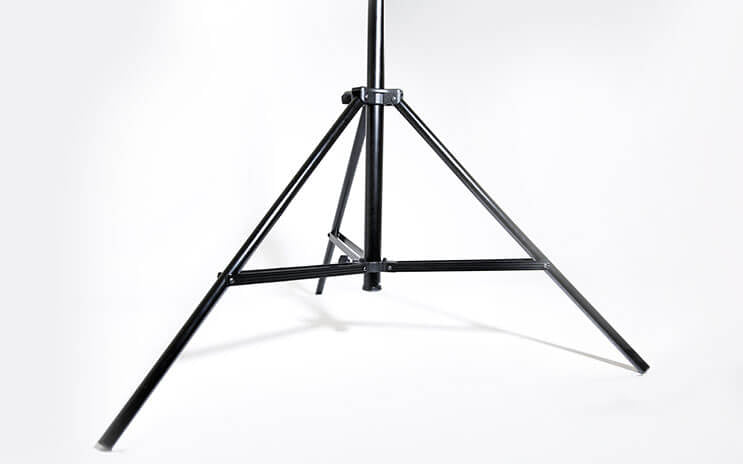
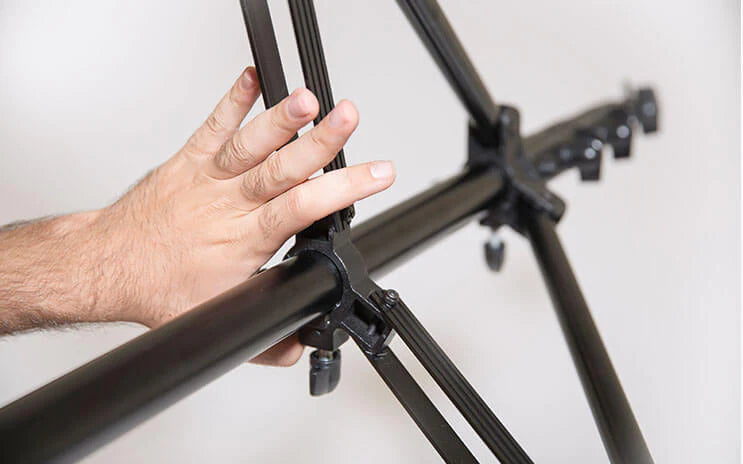
Spread the legs to the desired width. Tighten the 2 lower wing nuts and flip the stand over. Repeat this process with the other stand(s) and position the stands where desired.
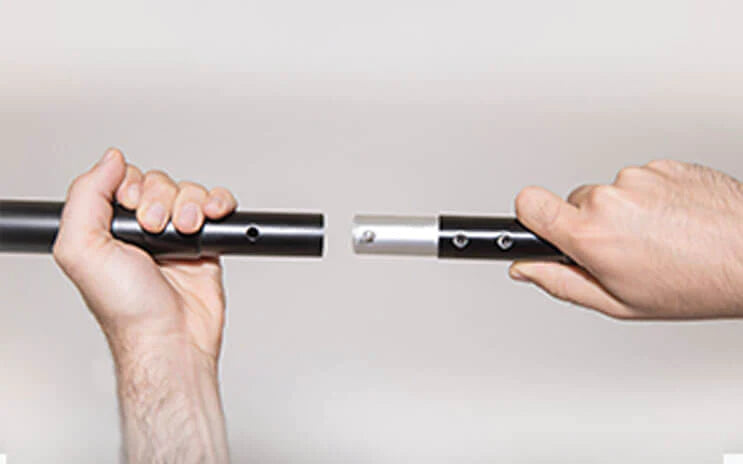
Take the 2 crossbar pieces and put them together by sliding the silver end of one bar into the narrower end of the other bar making sure the spring loaded pin snaps into the hole of the other bar.
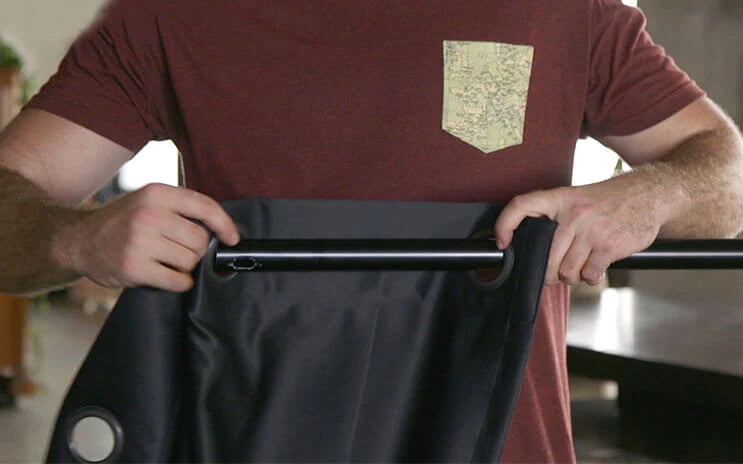
Slide your room divider onto the crossbar.
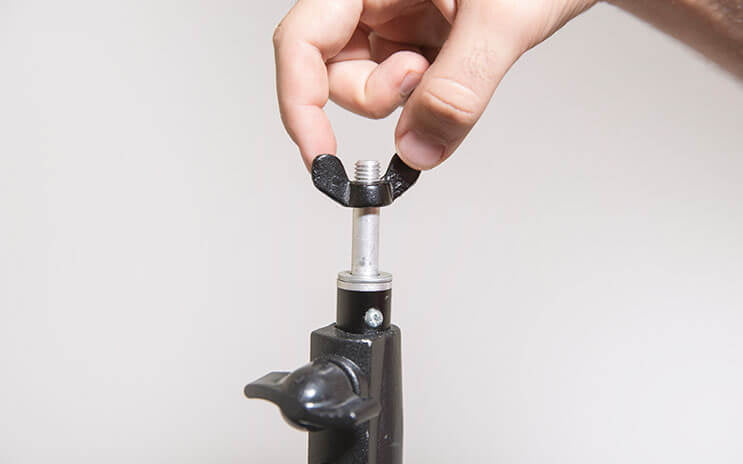
Remove wing nuts from the pins at the top of each stand.
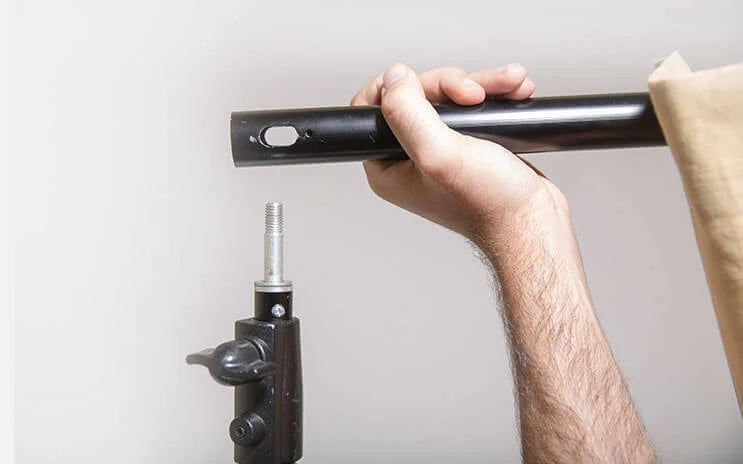
Lengthen the crossbar so that it reaches from one tripod stand to the other and set it on the pins. Please note, there are 2 holes at each end of the crossbar. Use the hole closest to the end of the bar if you want the divider to end at the tripod pole. Use the hole further in from the end if you want the divider to travel past the stand's legs.
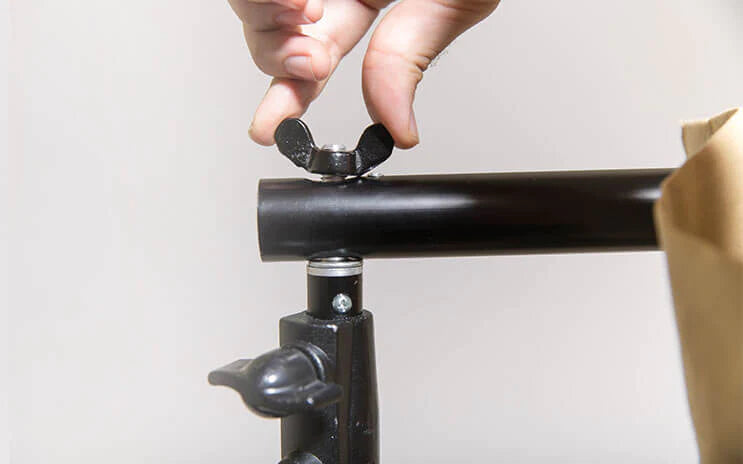
Screw the wing nuts back into the pins
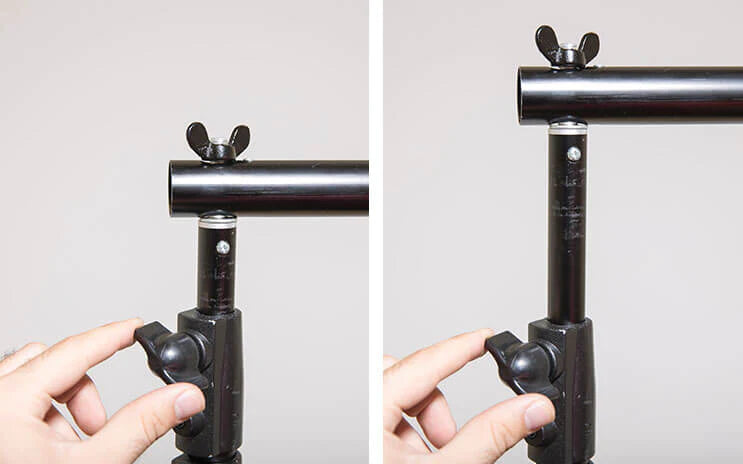
Slide each pole up until the divider is hanging at the desired height and tighten the upper 3 black wing nuts to lock the pole into position.
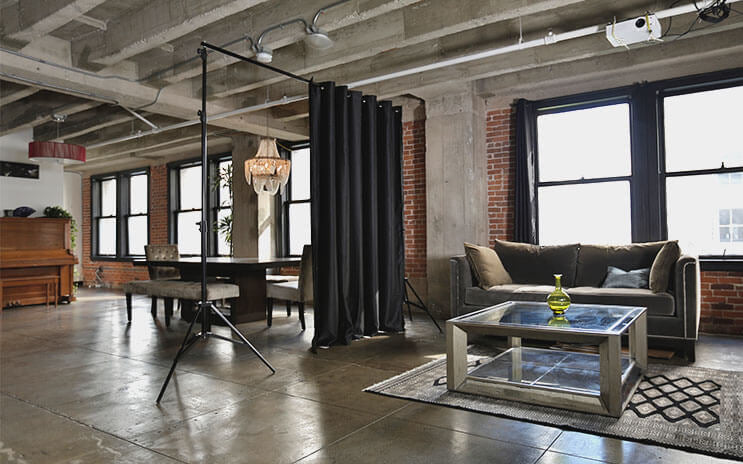
And there you have it, a freestanding room divider kit in no time! Detailed installation instructions for each kit size are included with your order.
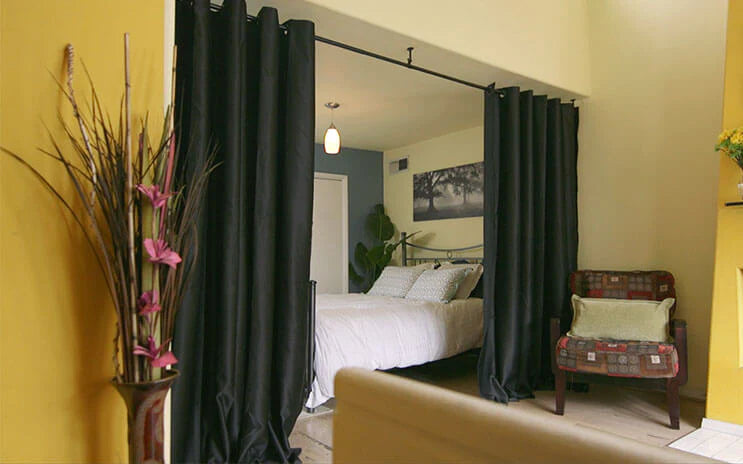
Bedroom & Office Partitions


We want you to enjoy your experience shopping on RoomDividersNow as much as you will love your new purchase!
Please contact our customer service department with any questions or concerns. We're here to help with everything from placing an order and delivery questions to size and hanging advice. And, even if you're set, we'd still love to hear from you.